
Lesson One -
Your First Bitmap
[1-2]
Lets get started by opening up the default theme by clicking
file
Then by
choosing "Open Theme..."
Figure 1.2

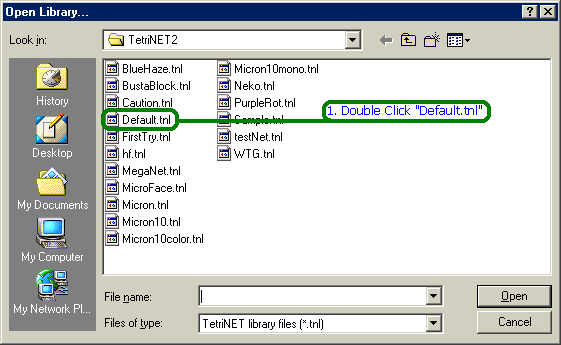
[1-3]
A little Window will pop up
From that
window you choose default.tnl
Figure 1.3
[1-4]
Once you Open Default.tnl
your Theme
Editor should display this information
Figure 1.4

[1-5]
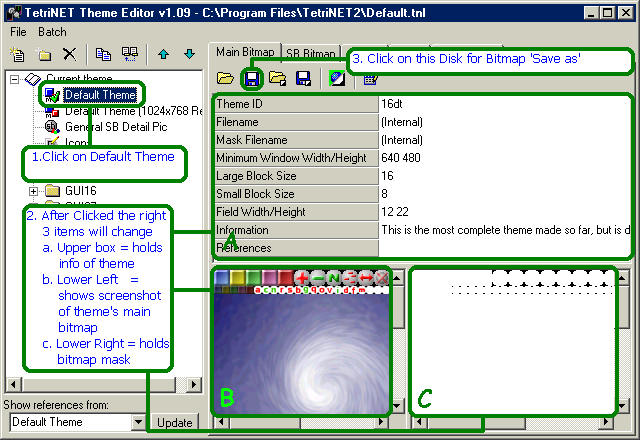
After clicking
the floppy this window should pop up
Save the
file as "test" and make sure its a .bmp file

We got the Bitmap
we wanted from the default theme
So now
we are going to make our own theme
click on
file again and click on "Save Theme As..."
Once again it
will bring up a little window
Save the
theme as "firsttry" and make sure its a .tnl file

Our theme is now the one we are working on after we saved "first try"
We have our
first theme but, nothing is changed yet
Open up
MS Paint, Paintbrush or any other image editing program to open your saved
"test.bmp"
(in the
pictures I used MS Paint)
With the file
open we can see how it normally looks and now we can change what we want
Note: upper
line of blocks are the one player blocks
lower line
of blocks are the opponents/teammates blocks
larger
field is 1st player field
smaller
field is other players fields
Everything
else can be used to leave credits, unless you change the size of field and/or
blocks, which will be explained in a later lesson
This step is
really up to you... Be Creative... or make what you would like to see
I justed
messed with the main field for this demonstration :)
*Make sure
to save the file after your done*

You made your
first images for your theme... so lets load them in your theme
Look to
the Upper Mid Center and click on the Leftmost Folder
The one
that is circled in red:
Once again the
little window will show up... click on the test.bmp
hopefully
with the first two save/load windows you know how it works
After you
Load the file it will appear in the Lower Left Screen
Scroll
around and you will see this.

The picture
is loaded and the theme has been already named
All we
have to do is "save theme"

After you click on save theme... depending on your computer's speed a little box may appear in the middle of the editor and say writing "firsttry.tnl" with a status bar. All you have to do now is pick the theme in settings on Tetrinet 2 like so.
Good Job!...
You have completed your first test theme!
I'm sure
yours looks much better than this theme for the tutorial
Next Lesson: More Detailed Look at the Main Bitmap :)